I recently came back from a research trip to France. I took... tens of thousands of photographs using a 10+ year old camera. It's focusing ability wasn't as good as it used to be, nor are my eyes or my ability to hold it super steady. So taking photos in low light cathedral interiors and museums means I came home with a larger than I'd like number of blurry photos. :(
So I was intrigued when I saw an ad for Topaz Sharpen AI. The reviews I saw for the program were pretty impressive and it turned out my husband had used some of their products in the past. So I got their free trial download (it's the full program that puts a watermark in the centre of test photos) and tested it. I was impressed enough that I bought it, and the Denoise AI program during their black friday/cyber monday sale.
I don't know enough about other similar editing programs, and I've only been playing with it for a few days, so this isn't a review. It's just some observations of how well the software has worked with the photos I've tried it on.
To start, the successes. The software gives 3 levels of sharpening: motion (camera shake or subject movement), out of focus, and softness. Photos that are just slightly blurry with clear lines are the easiest to fix. Here's an example of stained glass (I didn't choose the entire frame, so the section on the left didn't get sharpening), and a Virgin & Child statue. (Click on any image to scroll through larger versions of all the photos.)
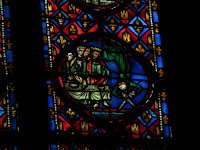 |
Blurry original stained glass.
|
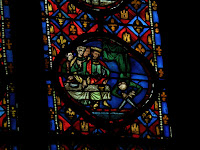 |
| Sharpened stained glass of Salome dancing before Herod. |
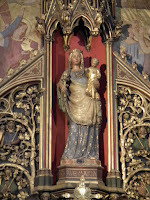 |
| Blurry Virgin & Child |
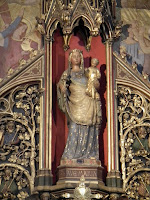 |
| Sharpened Virgin & Child |
The photo that sold me on the program though, was this one. I had to go very heavy on the anti-blur as I otherwise ended up with Mary having extra ghost fingers, but I'm very happy with how this one turned out. I also ran it through Denoise AI to make it look even better. I did find that their combined 'Photo AI' didn't do as good a job with this photo as the individual programs. I guess trying to de-noise & sharpen in the order Photo AI uses didn't seem to jive with this specific example. I couldn't get rid of the ghost fingers no matter what I tried. I love medieval ivories, so fixing this photo was amazing.
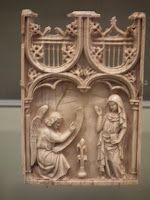 |
| Original ivory of the Annunciation |
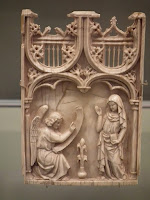 |
| Sharpened & de-noised ivory of the Annunciation |
As a historian I need to warn that with some fixes important detail is lost. So the photos can no longer be used as pure representations of the original (as much as a photo can in the first place). For example, I was able to make the following 2 photos usable from a general standpoint, but if you zoom in you can see that the detail isn't there. In the cathedral facade's sharpened image, you can see that the trefoils at the top still have some ghost effects showing the blur.
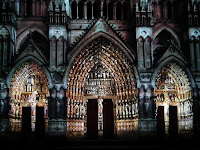 |
| Original light show on the west facade of Amiens cathedral. |
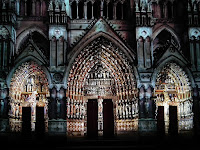 |
| Sharpened west facade of Amiens. |
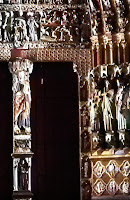 |
| Crop showing a lack of detail (though, part of this is also due to the light show, which created a shadow on the figures). |
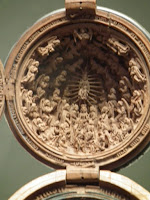 |
| Original photo of prayer bead with Virgin & Child. |
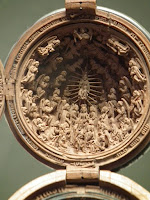 |
| Sharpened prayer bead. |
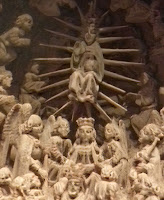 |
| Zoomed in image of sharpened prayer bead. |
You can clearly see how the program smeared the faces in the zoomed in prayer bead. I kind of like how the queen below Mary has become more skeletal, but this no longer reflects the true detail of the bead.
If there's too much blur the program is unable to fix it at all. I had a few failures and a few photos that turned out better than the originals, but still not usable.
It's always best to get a properly focused and sharp image in camera. But if you can't, this program does a shockingly good job on making slightly blurry photos usable. Is it worth it for you? Try out the software first. I'm just stoked that I can save some of my trip photos. :)


No comments:
Post a Comment